|
|
Tutorial: Creditor Administration |
|
|
Tutorial: Creditor Administration |
The Portal provides various administrative tasks to create and edit Creditors, create invoices and other transactions, make payments and adjustments to transactions, and a Supplier-based Cost Matrix. In this tutorial we will discuss these functions in detail.
This tutorial is concerned with the Administration section of the Creditor Menu. The Creditor Menu can be opened by selecting Menus and Creditors from the Navigation Menu. Select the Administration link to open the Administration section.
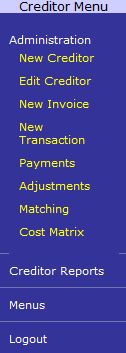
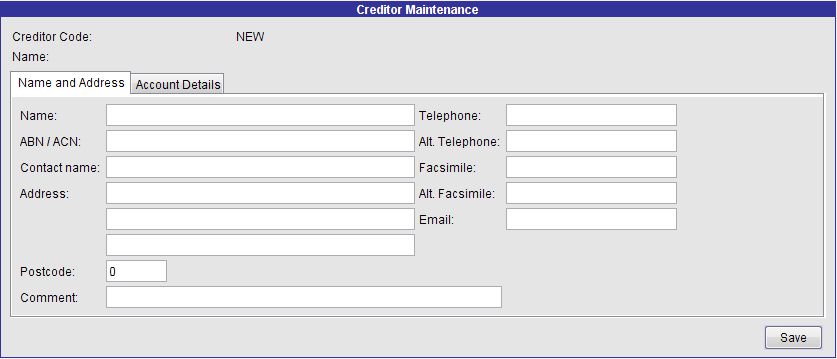
Select the New Creditor link in the Administration section of the Creditor Menu to create a new Supplier. The Creditor Maintenance screen is opened with blank details and a Creditor Code of NEW to indicate that the Creditor is new. There are two tabs of details that allow you to record the Creditor's details:
Name and Address, allows you to enter the contact details for your new Creditor. This tab contains fields to record the Name, ABN / ACN Number, Contact Name, Address, Postcode, Telephone and Fax Numbers and Email Address of the Creditor. There is also a field to record a miscellaneous Comment against the Creditor.
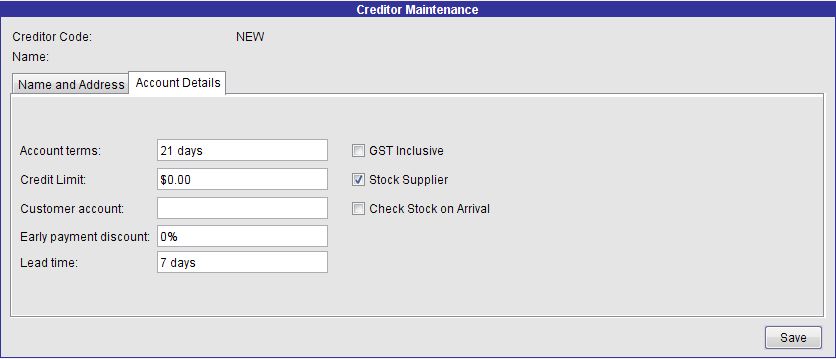
Account Details, allows you to record the details of the Creditor's account. In this tab you can record the Account Terms, Credit Limit, Customer Account Number, Early Payment Discount and Lead Time for invoices. Other settings in this tab include whether prices are GST-inclusive, whether the Creditor is a Stock Supplier and whether Stock is to be checked on arrival from the Creditor.
Enter the information for a new Creditor in each tab of the Creditor Maintenance screen and press the Save button to send the edited details to the Portal.
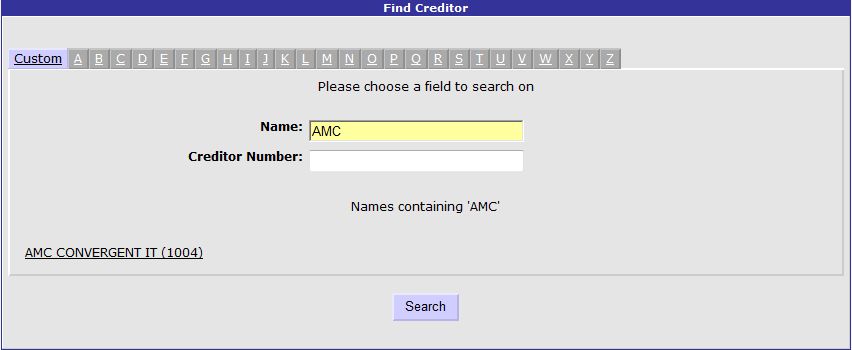
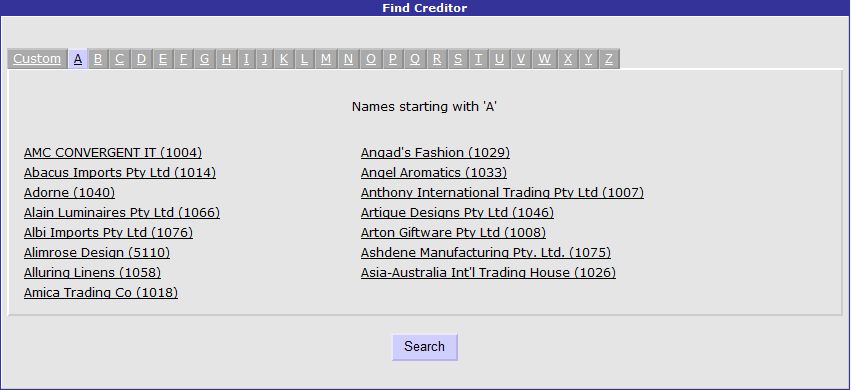
The Edit Creditor link can be used to edit an existing Supplier's details in the Creditor Maintenance screen. First the Find Creditor screen is opened, allowing you to search for a Creditor by Name or Creditor Number in the Custom tab. Alternatively, select a tab corresponding to the first letter of the Creditor's name to search all Creditors beginning with that letter.
Select the Creditor that you wish to edit and the Creditor Maintenance screen is loaded. However, when editing an existing Creditor there are two extra tabs of information:
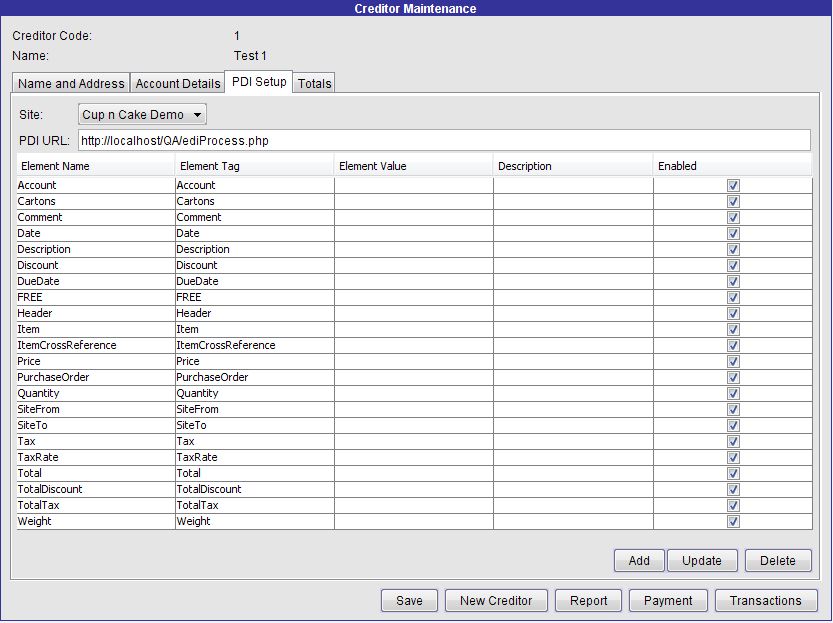
PDI Setup, controls the setup of Portal Data Interchange transactions to enable the processing of data between businesses. PDI works on the exchange of XML data between Portals, and this screen is used to set the XML tags and values in this transfer. Different sites can have different PDI settings for a Creditor. Select the Site for the settings from the provided drop-down list. Set the PDI URL and element names for each of the XML functions. The SiteTo field is a critical element that details the Site Number that the transaction is sent to. Enable or disable PDI functionality in this screen as necessary.
Totals, displays some totals for the Creditor for your information. This tab displays the Purchase and Payment Totals, Amount Outstanding (current balance) and the Date of the Last Payment.
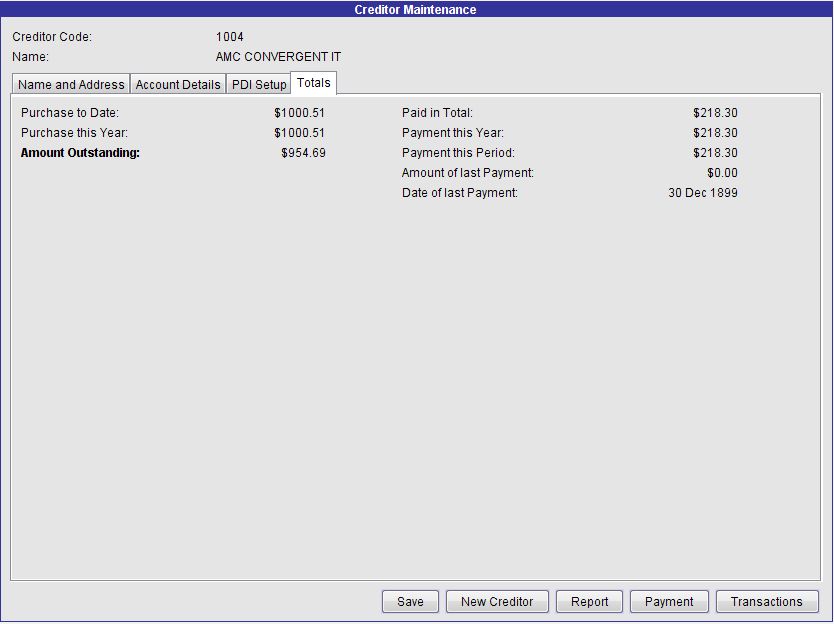
Also, four extra buttons are available in addition to the Save button. The New Creditor button can be pressed to create a new Creditor from this screen. Press the Report button to open the Creditor Invoices report, which reports on the invoices for the Creditor at a specific Site over the selected period. The Payment button can be pressed to open the Payments screen for the Creditor and the Transactions button opens the New Transaction screen for the Creditor.
The New Transaction link in the Administration section of the Creditor Menu opens the Find Creditor screen that allows you to select a Creditor to create a new transaction for. After you select a Creditor, the Creditor Transactions screen opens. The New Invoice link in the Administration section of the Creditor Menu also opens the Creditor Transactions screen (with the Transaction Type of Invoice) via the Find Creditor screen, as does the Adjustments link.
The Creditor Transactions screen is used to record a transaction involving a Creditor that does not involve Inventory Items. This might occur when the Portal is used to record Creditor transactions but does not include the Inventory package, or when the Company is invoiced for services provided by a Creditor. The Creditor Code, Payment Terms, Name, Current Balance and Available Credit for the Creditor are displayed at the top of the screen for your reference. Select the Site and Transaction Type for the transaction. Enter a Reference Number, Creditor Invoice Number and Order Number for the transaction and select a Ledger Type and Ledger for the transaction to be recorded against (for more information on Ledgers and their types, see the Ledgers Tutorial). For an Invoice, select the Due Date and record any Discount or miscellaneous Fee for the transaction. Record the Amount (Inc-Tax) and the amount of Tax in the transaction. If needed, enter a miscellaneous Comment against the transaction and press the Finalise button to send the transaction details to the Portal.
![]()
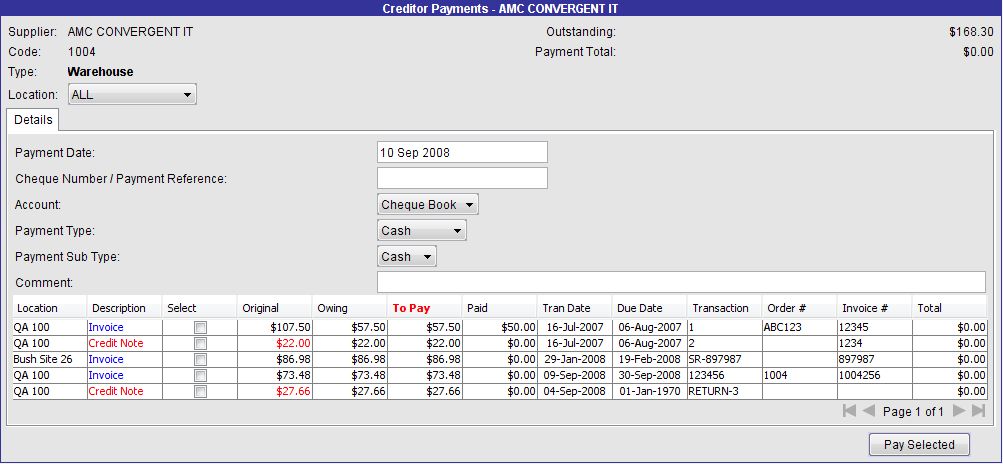
Payments can also be made against a Creditor. This function is performed in the Creditor Payments screen after the Creditor is selected in the Find Creditor screen. Select Payments from the Administration section of the Creditor Menu to open the Creditor Payments screen via the Find Creditor screen. The Creditor Payments screen displays the Supplier Name, Supplier Code, Outstanding Balance and Payments Total at the top of the screen for your reference. Select the Location to filter the transaction grid by. Enter the Payment Date in the provided field (current day by default) and a Cheque Number / Payment Reference for the payment. Select the Cash Book Account to make the payment from and the Payment Type and Payment Sub Type to represent the tenders involved in the payment. Enter any miscellaneous Comment as necessary for the payment.
The transaction grid lists all Creditor transactions for the Supplier. Use the Select checkbox to select one or more transactions to be paid and press the Pay Selected button to make a payment for the transactions selected. You will have the opportunity to print a hard copy receipt of the payment for your records.
The Matching link in the Administration section of the Creditor Menu opens the Matching Report which outlines stock receipts requiring matching to an invoice for a selected Site during a specified period. The Type drop-down can be used to view stock receipts with a different status - pending, finalised or all for example. The information in this report includes the Supplier Name, Supplier Account Number, Site Name, Receipt Number, Invoice Number, Status, Type, Receipt Date and Amount.
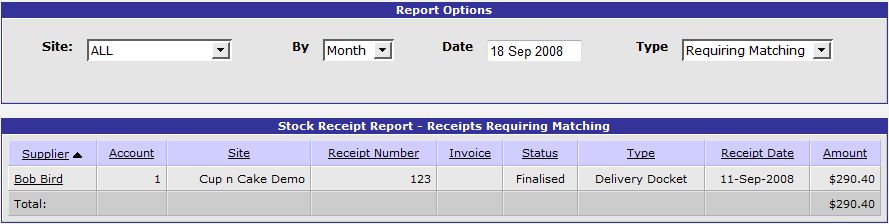
Click on a Supplier Name to open a popup menu with the following options:
Edit this Supplier, opens the Creditor Maintenance screen, allowing you to edit the details of the selected Supplier.
Display Stock Receipt, opens the Stock Receipt Management screen, allowing you to edit the details of a non-finalised receipt. You can also print or delete the receipt as needed from this screen.
Reprint Stock Receipt, opens a PDF version of the receipt, allowing you to save or print a copy of the receipt.
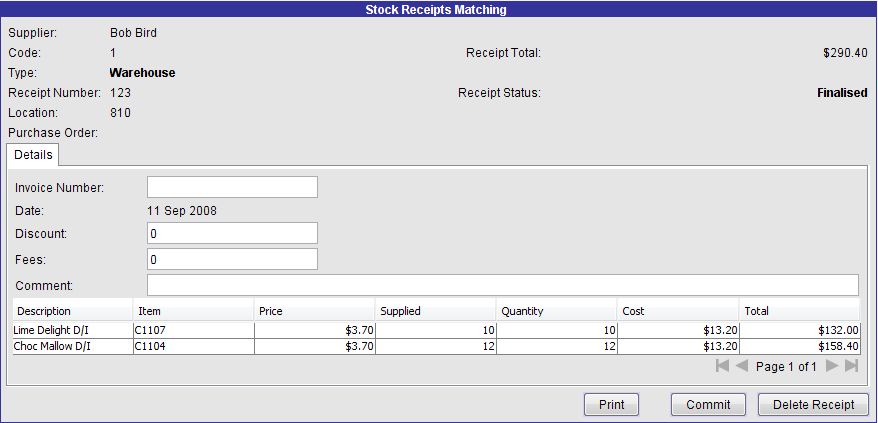
Match Invoice and Receipt, opens the Stock Receipts Matching screen, allowing you to enter an Invoice Number for the receipt. Enter any Discount, Fees or Comment as necessary and press the Commit button to match the invoice to the receipt. You can also choose to Print or Delete Receipt if required from this screen.
The final administrative function provided by the Portal for Creditors is the Supplier Cost Matrix. This is similar to the Department Cost Matrix except that it is used to set the price levels of items sold by Creditor rather than Department. Note that which Cost Matrix is used is set in the Price Matrix Company Options - if the Supplier Cost Matrix Enabled is set to true then the Supplier Cost Matrix is used, otherwise the Department Cost Matrix is used. Prices of items are updated in the Inventory Management screen in the Pricing tab using the button marked Update Prices via Department/Supplier Matrix.
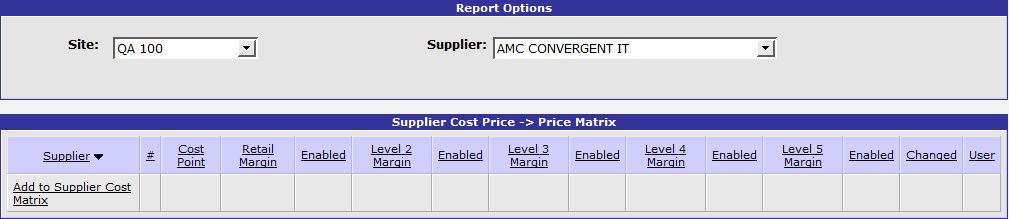
A Cost Matrix works on a sliding scale to set the price of items at a Site according to their cost. By selecting the Cost Matrix link from the Administration section of the Creditor Menu you will open a report screen that lists the Supplier Cost Matrices currently in use. Details listed include the Supplier Name, Supplier Code, Minimum Cost Point, Retail Margin and Enabled, and Level 2-5 Margin and Enabled. Select a Site and Supplier to filter the report by. From this report screen it is possible to edit a Supplier's Cost Matrix by selecting the Supplier Name link from the report. If the Supplier does not have a Cost Matrix in place, select the Add to Supplier Cost Matrix to create the matrix for the selected Supplier.
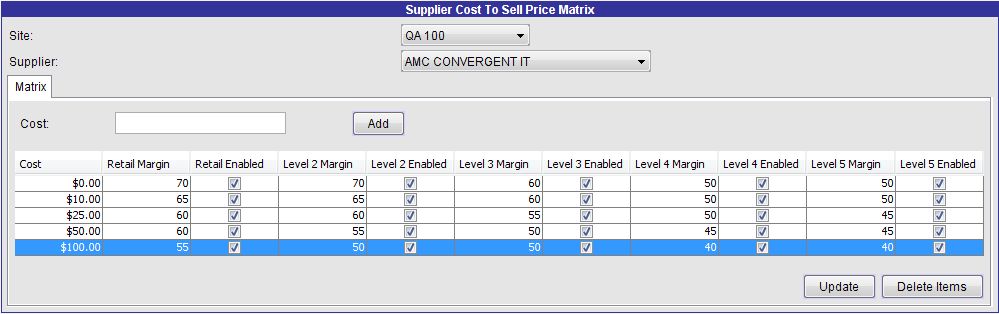
The Supplier Cost Matrix Maintenance screen is loaded to edit a Creditor's Cost Matrix. Ensure that the correct Site and Supplier have been selected for the Cost Matrix. A Cost Matrix uses cost ranges to determine the margins necessary to update the price of items. For example, you might set all items that cost over $20 to have a retail margin of 50% but all items that cost less than $20 to have a retail margin of 70%. In the Cost Matrix Maintenance screen, minimum cost points are added to the matrix grid and margins are set and enabled for the minimum cost point. To add a minimum cost point to the matrix grid, enter the value in the Cost field and press the Add button. Adjust the margins for the retail and other price levels as necessary in the grid. For each price level that you wish to update using the matrix, enable it by ticking the appropriate Enabled checkbox. Press the Update button to save the cost point setting or select an unwanted cost point and press the Delete Items button to remove it from the grid.
This tutorial has explored the administration of Creditors. We have demonstrated the methods of creating new Creditors or editing existing ones in the Creditor Maintenance screen. Transactions and Payments have been described in this tutorial, and we have explained how to use a Supplier Cost Matrix to set margins for items based upon their unit cost.