|
|
Tutorial: Cash Book |
|
|
Tutorial: Cash Book |
The Portal uses the Cash Book module to reconcile external accounts for the Company. In this tutorial we will investigate the maintenance of external accounts, discuss the methods of reconciliation available and discover the reporting options in the Portal for the Cash Book system.
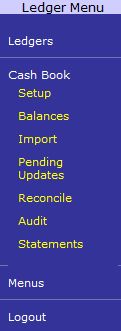
This tutorial discusses the Cash Book section of the Ledger Menu. The Ledger Menu can be opened by selecting Menus and Ledger from the Navigation Menu. Open the Cash Book section by clicking on the Cash Book link in the Ledger Menu.
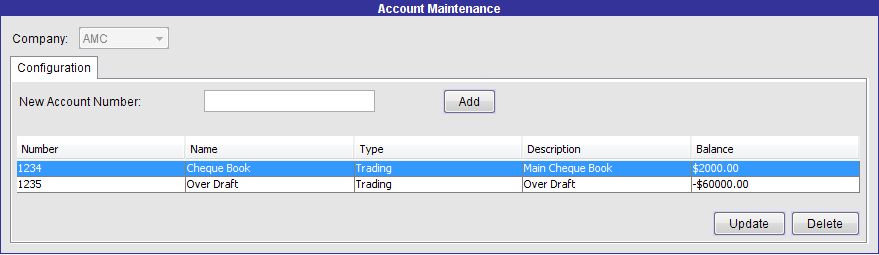
The Setup link in the Cash Book section of the Ledger Menu opens the Account Maintenance screen. This screen is used to create, edit and remove external accounts for the Cash Book module. To create a new account, enter the New Account Number and press the Add button. Edit the Name and Description columns in the account grid and select a Type for the account - Trading, EFT, High Interest, Suspended or Bonds. A Company Administrator is able to adjust the Balance of an account by editing the Balance column. Press the Update button to save the details of the Cash Book Accounts to the Portal. An account can be removed from the Portal by selecting it in the account grid and pressing the Delete button.
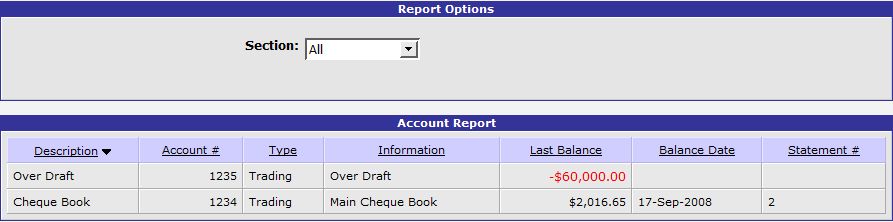
Use the Balances link in the Cash Book section of the Ledger Menu to open the Account Report. This report is used to view the current balance of the Cash Book Accounts in the Portal. Use the Section drop-down list to filter the report by account type. Information displayed in this report includes the Account Description, Account Number, Account Type, Information, Last Balance, Balance Date and Statement Number. If the account has not yet been reconciled, the balance date and statement number fields will appear blank in this report.
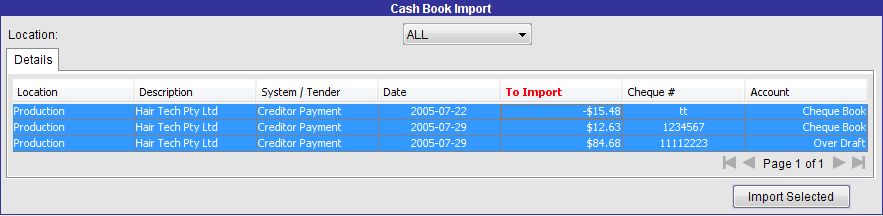
The Cash Book Import screen allows you to import transactions that occurred prior to the enabling of the Cash Book system or those that were performed without an associated Cash Book Account. The Import link in the Cash Book section of the Ledger Menu opens the Cash Book Import screen, allowing you to associate a Cash Book Account to transactions. Use the Location drop-down to filter the transactions to be imported. For each transaction, select a Cash Book Account to import them to in the Account column. Select one or more transactions and press the Import Selected button to import the transactions.
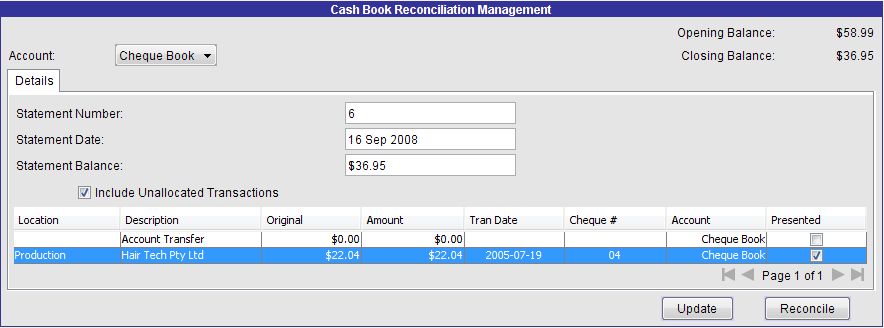
The Reconcile link in the Cash Book section of the Ledger Menu opens the Cash Book Reconciliation Management screen. This screen allows you to reconcile the balance of your Cash Book Accounts according to the outstanding transactions (from Import procedures and Creditor and Debtor transactions). Select the Account from the provided drop-down list and the Opening Balance for the selected account can be seen in the top-right of screen for your reference. Enter the Statement Number and Statement Date for the reconciliation. The Statement Balance must be equal to the Closing Balance of the Account. This is calculated as you select transactions from the grid to be reconciled. These should be the transactions that appear on the statement from the bank. Check the box marked Include Unallocated Transactions to view transactions that have not been assigned to a Cash Book Account in addition to those assigned to the selected Account. Edit the Amount of each transaction if required and select all transactions to be reconciled by checking the box marked Presented. You can also change the Account assigned to any of the transactions in the grid. Press the Update button to save any changes to the transactions in the grid. Use the Reconcile button to perform the reconciliation.
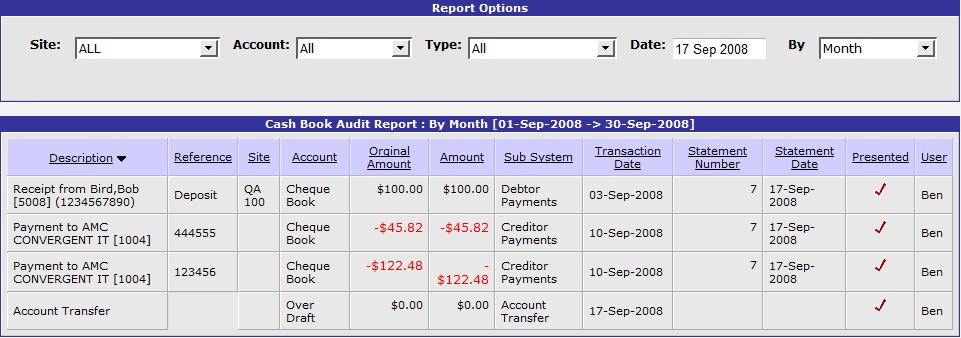
The Audit link in the Cash Book section of the Ledger Menu opens the Cash Book Audit Report. This report lists all Cash Book Account transactions in the Portal for a selected Site during a specified period. The Account drop-down list can be used to filter the report to the selected Cash Book Account and the Type drop-down list filters the report according to transaction type - debtor payments, bank fees or interest paid, for example. The information in this report includes a Description of the Transaction, Reference Number, Site Name, Cash Book Account, Original Amount, Actual Amount, Transaction Date, Statement Number, Statement Date, User and whether the transaction had been Presented in a reconciliation.
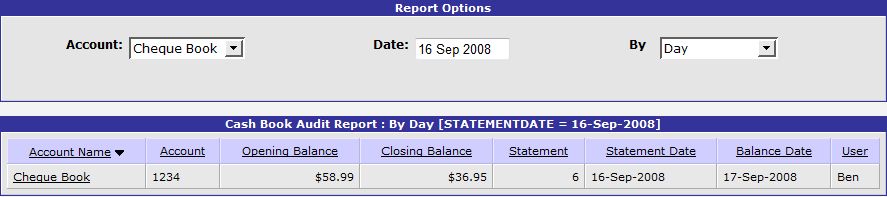
The Cash Book Statements Report can be opened by selecting the Statements link in the Cash Book section of the Ledger Menu. This report sumarises the details of the statements entered in the Reconcile screen for a selected Account during a specified period. Information in this report includes the Cash Book Account Name, Account Number, Opening Balance, Closing Balance, Statement Number, Statement Date, Balance Date and the User that entered the statement.
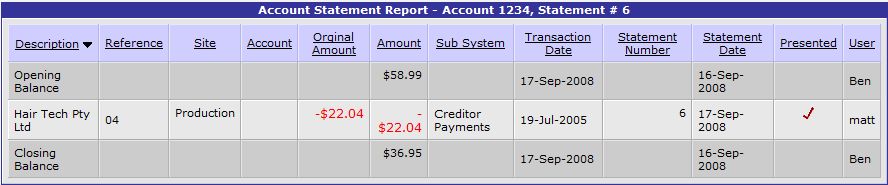
Select an Account Name to open the Account Statement Report, which provides a detailed analysis of the selected statement. This drill-down report provides the Transaction Description, Reference Number, Site Name, Account, Original Amount, Final Amount, Type, Transaction Date, Statement Number, Statement Date, User Name and Presented Status for each transaction in the selected Statement. Details of the Opening and Closing Balance for the Statement are also displayed.
In this tutorial we have investigated the Cash Book side of the Ledgers package. The maintenance and reconciliation of Cash Book Accounts and the reporting of these processes have been discussed.