|
|
Tutorial: Stock Receipts |
|
|
Tutorial: Stock Receipts |
An important aspect of Procurement is the receipt of stock that has been ordered from a Supplier. In this tutorial we will discuss the process of entering stock receipts in the Portal. We will look at entering receipts both manually and from a previously entered Purchase Order, updating prices of items based upon their new costs when received and printing item and shelf labels based upon the receipt of items. This tutorial will also describe the reporting features of the Portal in relation to Stock Receipts.
This tutorial will discuss the screens accessed from the Stock Receipts section of the Procurement Menu. The Procurement Menu can be opened by selecting Menus, Inventory and Procurement from the Navigation Menu. Click on Stock Receipts to open the section. This section of the Procurement Menu contains a link to the Site Options that relate to Stock Receipts.
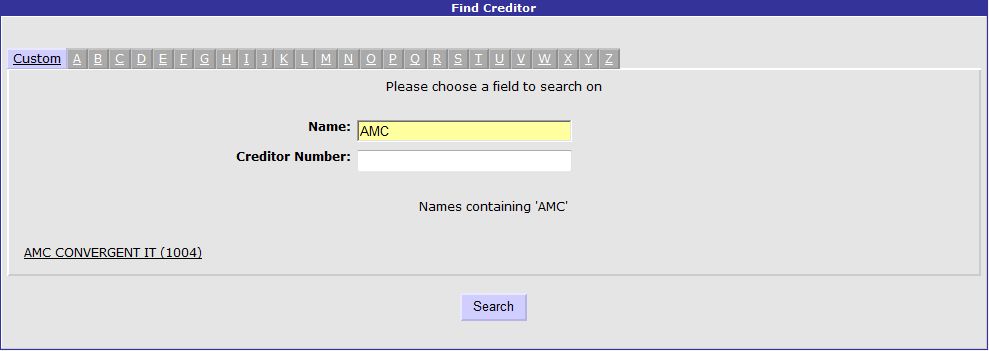
The Edit Receipts link in the Stock Receipts section of the Procurement Menu allows you to enter received packs of stock items manually or from an existing Purchase Order. The first step in this process is to select the Creditor that the stock has been received from. Use the Find Creditor screen to do this - you can use the Custom tab to search for the Supplier by Name or Creditor Number, or use the tab with the letter that corresponds to the first letter of their name.

After you have selected your Creditor, the Stock Receipts screen is opened for a new receipt. Some Supplier details are loaded for your reference, including the Supplier Name, Supplier Code and Available Credit. Some totals for the received stock and the Receipt Status are displayed in the top-right corner of the screen. It is possible to select a Receipt Number to edit, or use the New Receipt selection to create a new one. Select the Site that is receiving the Stock from the Location drop-down list.
The Details of the receipt are entered in the bottom section of the screen. The Receipt Type can be an Invoice or a Delivery Docket - an invoice can include a Discount, Freight charges and miscellaneous Fees. Enter a Receipt Number in the provided field and check whether Costs Inclusive of GST needs to be ticked. There is a field provided for miscellaneous Comments for the receipt. The Date of the receipt is set to today's date and cannot be edited.

If the received Stock relates to a Purchase Order the items can be loaded from the order by pressing the Select Order button. Items can be added one at a time by entering the Item Code and pressing the Add button. Use the Find Item button to search for items to add or the Find by Cross Reference button to search by Supplier Cross Reference Number for the item to be added. As each item is added its Description, Retail Price and Stock on Hand figures are displayed for your reference. As each line is entered in the receipt, enter the total number supplied, the amount received and the quantity that were supplied free of charge.
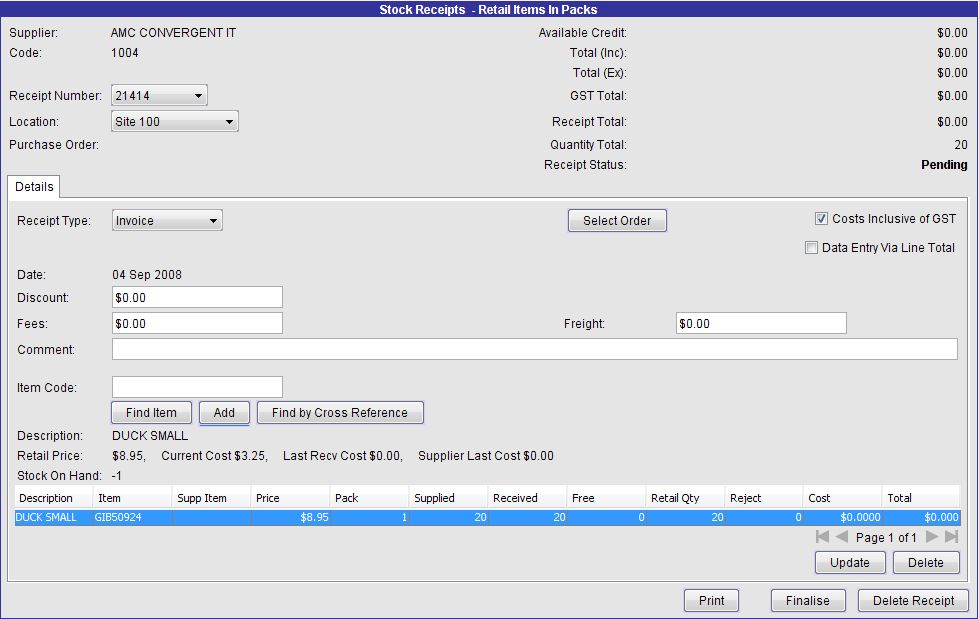
Press the Update button to save the line to the receipt; the Delete button can be used to remove a selected line from the receipt. The Finalise button is used to commit the details of the stock receipt. Stock on hand figures for the entered items are immediately updated. The Print button allows you to print a hard copy of the details of the receipt. Use the Delete Order button to remove the receipt from the Portal.
The Portal provides a Stock Receipt Summary report that can be accessed by clicking the Summary link in the in the Stock Receipts section of the Procurement Menu. This report lists the Stock Receipts for the selected Site during the specified period. The Type drop-down list allows you to view only receipts with a specific status if desired. Displayed information in this report includes the Supplier Name, Account Number, Site, Receipt Number, Invoice Number, Status, Type (Invoice or Delivery Docket), Date of the Receipt and the Total Amount of the Receipt.

Clicking on a Supplier Name in this report opens a popup menu allowing you to perform the following actions:
Edit this Supplier, opens the Creditor Maintenance screen to allow you to edit the details of the Supplier.
Display Stock Receipt, opens the Stock Receipts screen for the receipt, allowing you to print or delete the receipt. This option is only available to finalised orders.
Edit Stock Receipt, opens the Stock Receipts screen for the receipt, allowing you to edit, finalise, print or delete the receipt. This option is only available to non-finalised orders.
Reprint Stock Receipt, previews the PDF version of the receipt which can then be saved or printed in hard copy.
Labels From Receipt, opens the Receipt Label Management screen, allowing you to print shelf labels for the items received. This option is only available to finalised orders.
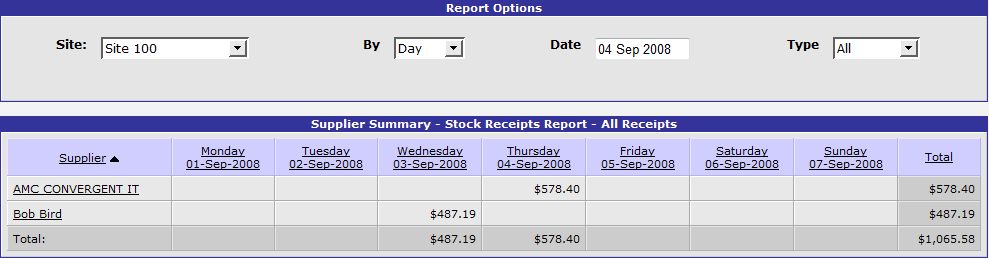
The Supplier Summary link in the Stock Receipts section of the Procurement Menu displays a report that lists totals of stock received at a selected Site over a specified period by Supplier. The Type drop-down allows you to view the totals for receipts that are pending, finalised, deleted or all types. Note that reporting on deleted receipts is only available if the Site Option for non-destructive deletion of receipts is set to True for the Site.
Clicking on a Supplier Name in this report opens a popup menu allowing you to perform the following actions:
Edit this Supplier, opens the Creditor Maintenance screen to allow you to edit the details of the Supplier.
Show Receipts for this Supplier, opens a report screen that lists the totals of all stock receipts for the Supplier with the receipt number. The receipt number can be clicked to view the PDF of the receipt.

Show Items Receipted from this Supplier, opens a report that ranks the items received from the Supplier by Site in a selected period. The Range tab allows you to adjust the report to display the Top X number of records.
Select Stock Receipt for this Supplier, opens the Stock Receipts screen to allow you to select a receipt from the Supplier to edit, print, delete or finalise as required.
The Price Matrix allows you to set prices according to the cost incurred for items in a stock receipt. This feature allows you to update prices when cost changes are incurred. The recommended margin or markup is retrieved from the Supplier Matrix or Department Matrix as appropriate, although this can be adjusted for any of the Price Levels in the grid. Save the changes to the grid using the Update button and use the Commit button to send the new prices to the Portal for the items. The price changes will be listed in the Price Change Release report as having type Receipts.

The Labels link in the Stock Receipts section of the Procurement Menu opens the Receipt Label Management screen, allowing you to print labels for the items that have been received. Label management occurs in batches - labels are printed according to the receipt number. Edit the details of the label batch by editing items in the grid. The buttons in this screen allow you to print a batch of item labels, shelf labels or advanced labels, delete an item from the batch or update the batch details.

In this tutorial we have looked at the Stock Receipts section of the Procurement Menu. The screens accessed from this section allows Sites to record the receiving of Inventory Items in the Portal, an important aspect of stock control. We have looked at the reporting of Stock Receipts and ways in which we can update the pricing structure of received goods based upon changes in cost. Printing of labels for received items was also discussed.