|
|
Tutorial: Purchase Orders |
|
|
Tutorial: Purchase Orders |
Purchase Orders provide a means of reordering stock for a Site when it is needed. The Portal has several methods of generating Purchase Orders and in this tutorial we will discuss each method. We will also look at two reports in this tutorial that list the Purchase Orders according to status and supplier.
In this tutorial, we will be looking at the Purchase Orders section of the Procurement Menu. The Procurement Menu can be opened by selecting Menus, Inventory and Procurement from the Navigation Menu. Two links are provided to allow you to review the Company Options and Site Options for Purchase Orders.

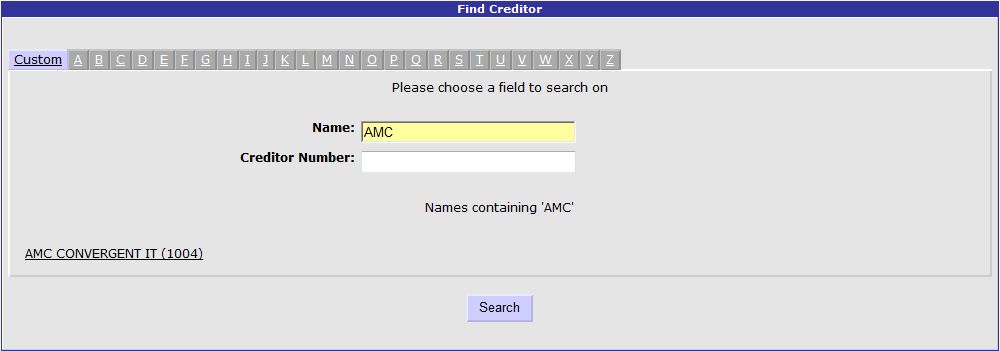
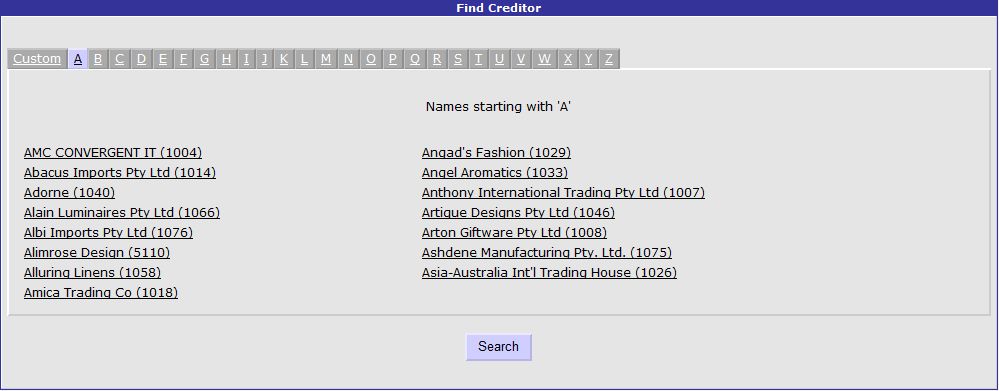
The first method of Purchase Order creation that we will look at in this tutorial is manual entry. This is where the user manually enters each item to be ordered from a specific supplier (also known as a Creditor in the Portal). Select the Edit Orders link from the Purchase Orders section of the Procurement Menu which opens the Find Creditor screen. This screen allows you to search for a Creditor to create the Purchase Order for. You have the option to enter the Creditor's name or number in the Custom tab of this screen or select the first letter of the Creditor's name to display all Creditors beginning with that letter.
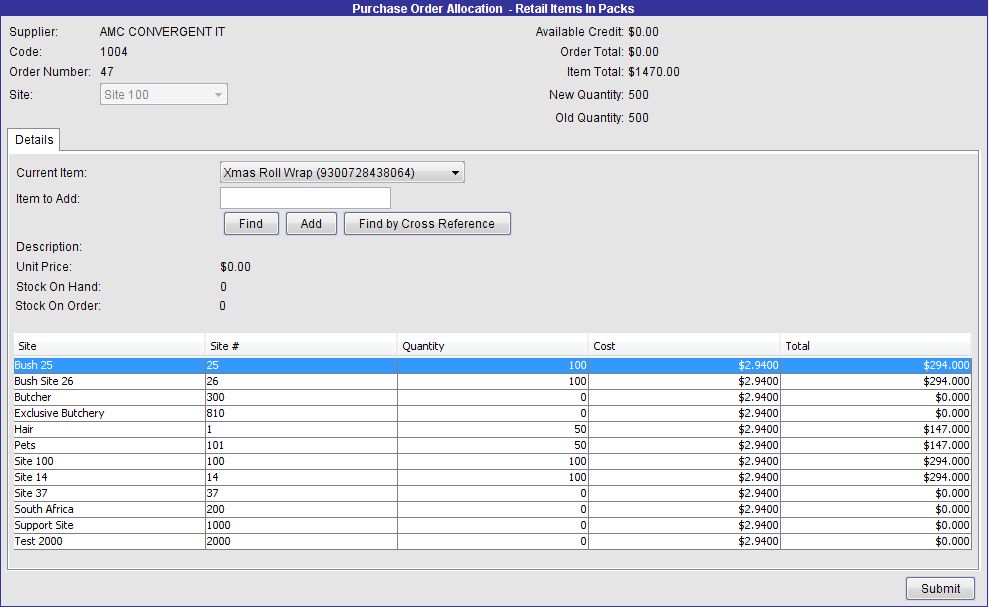
Select a Creditor to order stock from. The Purchase Order screen is opened with some of the selected Supplier's details displayed including the Supplier Name, Supplier Code and Available Credit. It is possible to load an existing order for editing by selecting it from the Order Number drop-down list. As items are entered/edited, the Order Total is updated. An Order Status and Order Type are assigned to the Purchase Order to identify the state of the order in the Portal. A Date and Due Date for the order are automatically attributed but can be edited if necessary. You can enter some delivery Instructions if necessary in the provided field.
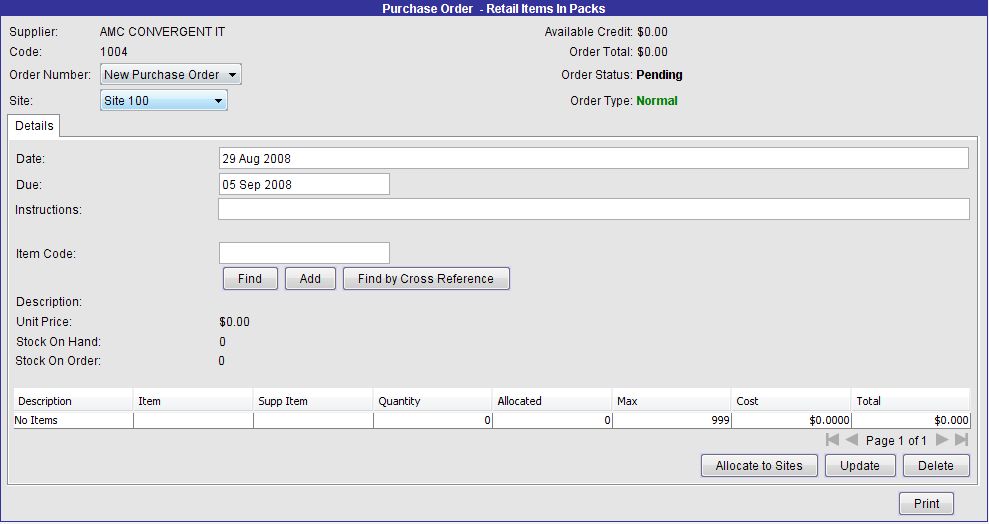
When creating a Purchase Order manually, items are entered one at a time. Enter the Item Code or use the Find button to search for the item and press the Add button to add the item to the order. It is also possible to search for items by their cross reference number - use the Find by Cross Reference button to do this. Before pressing the Add button, the entered item is displayed with its Description, Unit Price, current Stock on Hand and current Stock on Order to help you calculate the number that you need to order. Once the item is added to the grid you can enter an amount to order by entering it in the Quantity column.
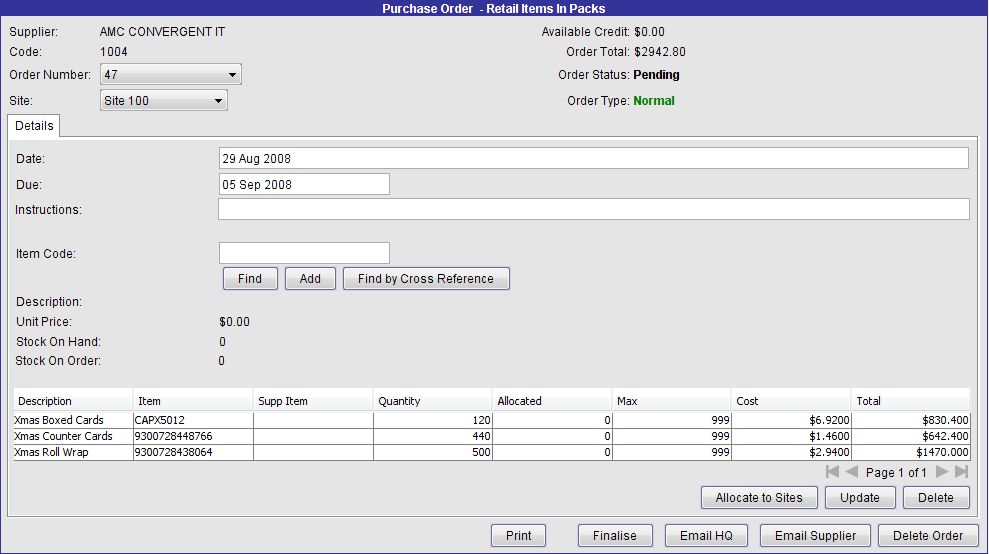
Press the Update button to save the Purchase Order after you have added your items. A line can be removed from the grid by selecting it and pressing the Delete button. If the order is being created from Head Office an additional button, Allocate to Sites, allows you to specify the Sites that will receive the ordered Stock.
There are five buttons at the bottom of the screen to control the status of the order. The Print button allows you to view a PDF of the Purchase Order and subsequently print it to mail to the supplier. The Email Supplier button can be used to send the Purchase Order by email to the Creditor. Delete Order removes the order from the Portal permanently will the Finalise button is used to keep the order on record but finalise it (allowing for historical reporting). If Head Office is required to approve Purchase Orders (see Company Options Purchase Orders) the Email HQ button is used to send a copy of the order to Head Office for approval. If the Company and Creditor are PDI Enabled, the Finalise With PDI button appears, allowing you to finalise the Purchase Order and send it to the Creditor's Portal via XML Portal Data Interchange where a corresponding Customer Order is generated.
There is also a mechanism in the Portal to create Purchase Orders automatically based upon sales trends or par stock levels. Select the Auto Create link in the Purchase Orders section of the Procurement Menu to open the Purchase Order Generation screen. Items can only be ordered by this system if they have the appropriate settings in the Stock Control tab of the Inventory Maintenance screen. The Auto Create facility calculates the quantities of items to be ordered according to a specified criteria, but the Purchase Order is not generated until later in the Edit In Progress screen described below.
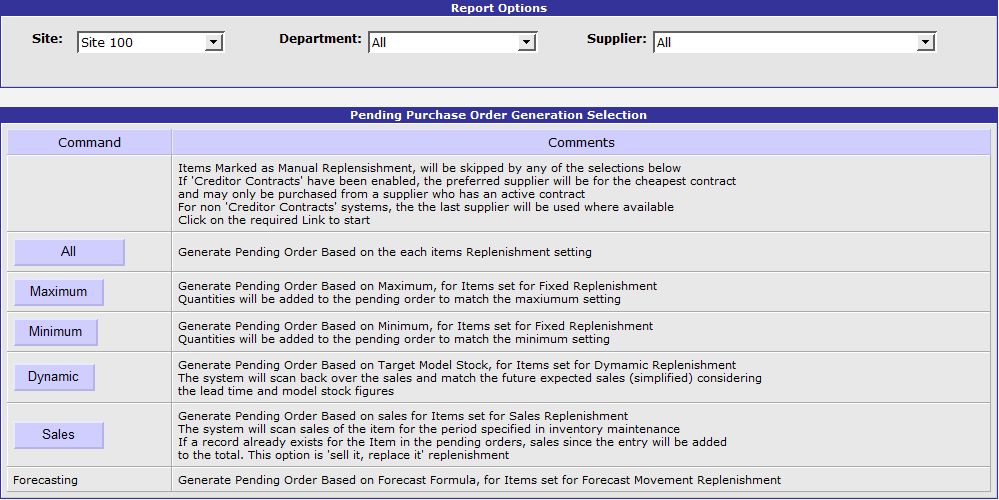
Drop-down lists are provided to select the Site, Department and Supplier for the Purchase Order. There are five different ways to create a Purchase Order automatically that can be selected by pressing one of these buttons:
All, generates orders based upon each item's replenishment setting. For example, if one item has a replenishment method of Fixed (Maximum), the Maximum method will be used to reorder it.
Maximum, generates orders based upon the Maximum Stock on Hand setting for each item with the Fixed (Maximum) replenishment method. Items with other replenishment methods set are not reordered and those that are ordered have a quantity ordered to return their stock on hand to their maximum level.
Minimum, generates orders based upon the Minimum Order Quantity setting for each item with the Fixed (Minimum) replenishment method. Items with other replenishment methods are not reordered and those that are ordered have a quantity ordered to return their stock on hand to their minimum level.
Dynamic, generates orders for items that have the replenishment method of Dynamic Reorder Level. Items are ordered according to the quantity sold according to the Supply Lead Time set for the item.
Sales, generates orders for all items that have the replenishment method of Sales History. Items are ordered according to the sales quantity of the item in the scan period. This system replaces items that have been sold for a period.
Forecasting, generates orders for all items that have the replenishment method of Movement Forecasting. Items are ordered according to the sales quantity of the item in the scan period and the number of days of stock required to keep on hand for the item.
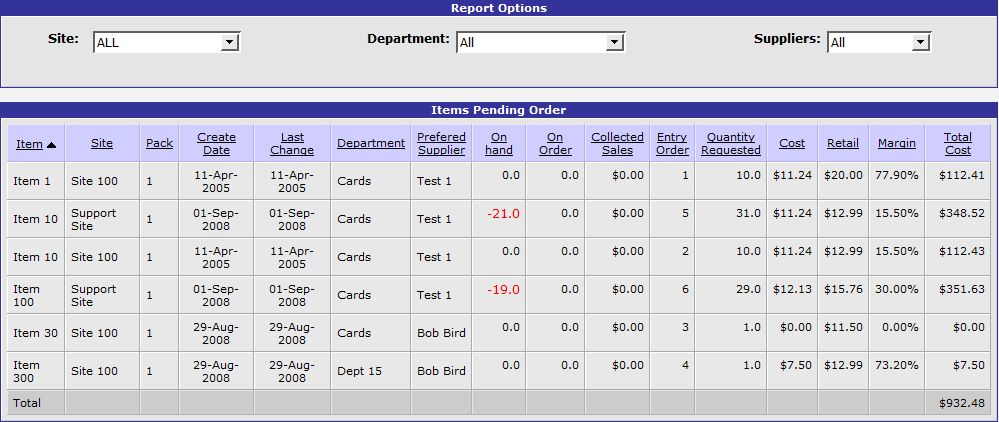
When the Purchase Order is created automatically it is still possible to edit it before sending it to the supplier. All automatically created Purchase Orders that have not yet been submitted are said to be "In Progress". The In Progress link in the Purchase Orders section of the Procurement Menu opens a report that lists all pending Purchase Orders that were automatically created by one of the methods listed above.
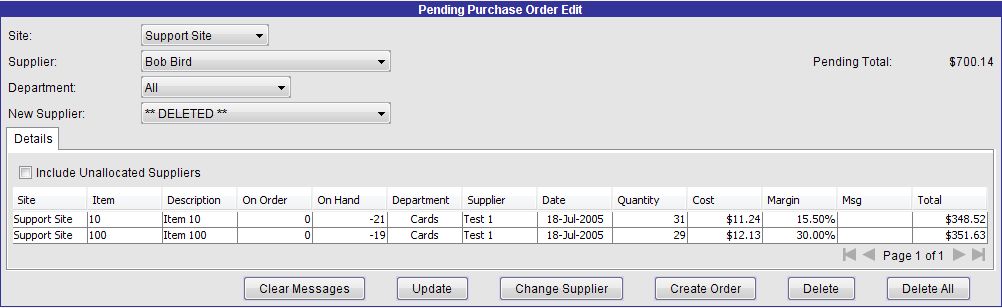
You can use the Edit In Progress link in the Purchase Orders section of the Procurement Menu to edit any of the pending orders. Select the Site, Supplier and Department for the items to be ordered. The screen will refresh and display the list of items in the selection criteria that have been ordered by the Auto Create facility. If desired you can change the Supplier that the items are ordered from by selecting a New Supplier and pressing the Change Supplier button. Use the Include Unallocated Suppliers checkbox to list items that have not been allocated to a supplier but have been ordered using the Auto Create facility. Edit the items in the grid as necessary and press the Update button to save the order to the Portal. You can clear automatically generated messages by pressing the Clear Messages button. The Delete button will remove a selected line from the order and Delete All removes all lines from the order. Press the Create Order button when you are satisfied with the order details and a Purchase Order will be created. It can now be selected in the Edit Orders screen and manually edited, sent to Head Office or the Supplier via email or printed out in hard copy.
The Portal provides two main reports to allow you to view your Company's purchasing habits. The Purchase Order Summary Report, accessed by clicking the Summary link in the Purchase Orders section of the Procurement Menu, displays details of the Purchase Orders for a selected Site in a specified period according to the Purchase Order status.

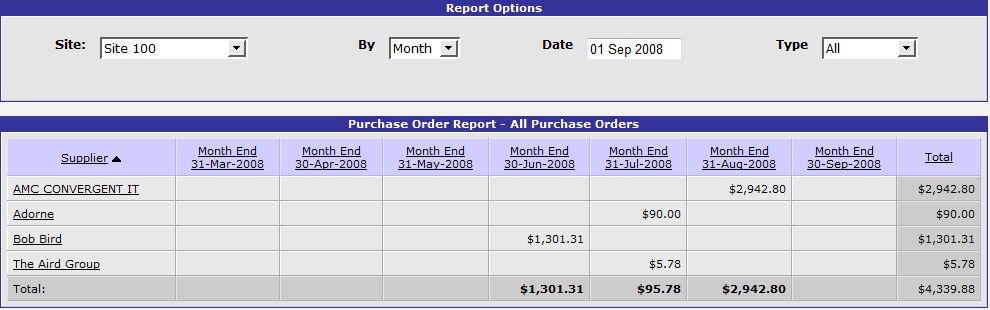
The other available report is called the Purchase Order Supplier Summary Report which displays totals of items ordered by Supplier for a selected Site and period according to the Purchase Order status. This report is useful to identify the totals of items for pending Purchase Orders for your Suppliers, for example.
In this tutorial we have discussed the two methods of reordering stock in the Portal and looked at the reporting mechanisms available to us. Stock reordering is an important aspect of stock control and we have displayed how simple it is to maintain your Sites' stock levels.