|
|
Tutorial: Advertisements |
|
|
Tutorial: Advertisements |
Advertisements are a great way to inform your customers of your venue's upcoming events and promotions. The Vision Portal's Advertisement Builder allows the user to design simple or complex advertisements with a wide range of special effects to attract the attention of your customers. In this tutorial we will see just how easy it is to create advertisements for use in your venue's Vision terminals.
If the Portal's Navigation Menu is not already in the Vision Menu, start by navigating to the Vision menu by clicking the Menus link followed by Vision. Open Vision Maintenance by clicking on the link and a drop-down list of menu items will be displayed. A link is provided to allow you to open the Company Options for the Vision system. Click on Edit Vision to open the Online Advertising Editor for your company.

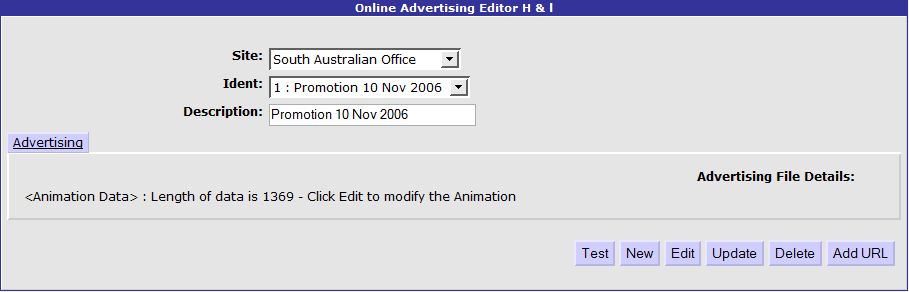
If you have created at least one advertisement in the Portal then it will be selected and some basic details will be displayed. From here you are able to select an advertisement and test it by pressing the Test button or edit the advertisement by pressing the Edit button. The other buttons can be pressed to create a New advertisement, Delete the selected advertisement, Update the Vision Portal with the changes that have been made or add the selected advertisement to a specific URL through the use of the Add URL button. In this tutorial we will create a new advertisement from scratch, test it on our screen and then update the portal to save the changes, but note that the steps are very similar to edit an existing advertisement.
Press the New button to start a new advertisement and after a few seconds the Vision Advertising Widget will appear. The advertisement will be placed in a "wrapper" which is basically a section of the screen that houses the advertisement. The type of wrapper that you choose will directly affect what you can do with your advertisement. A Flash Wrapper can be used to house a SWF movie file that has been created by an external program such as Dreamweaver. An Image Wrapper can be used to house a JPG or GIF image which can be used to display photos of events for example. AVI Wrappers are used to house Windows Media Player files and an HTML Wrapper allows you to create an advertisement using an HTML Editor. We will create an advertisement using an Animation Wrapper which is a basic animation that displays editable text with various special effects. The final wrapper type is a Jackpot Wrapper which is a special type of wrapper designed for use with Jackpot Banners to display the winner of the latest jackpot draw.
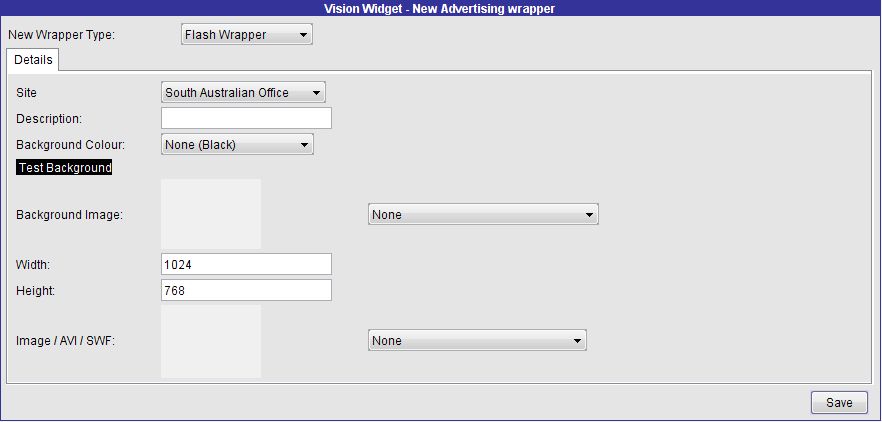
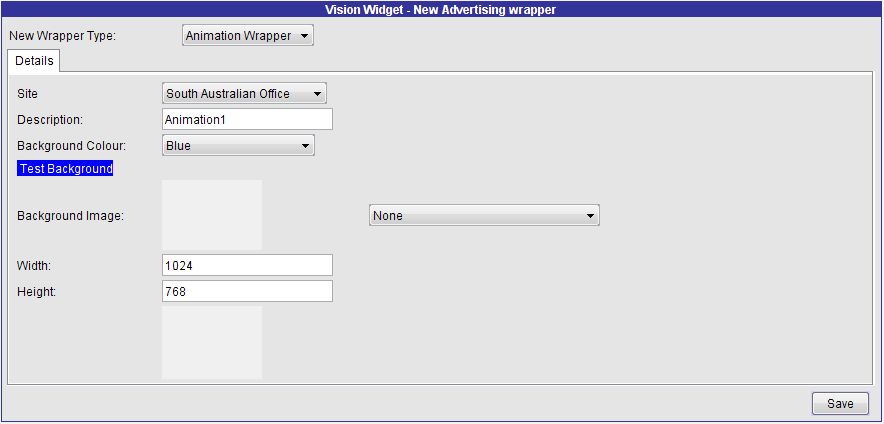
Select Animation Wrapper from the New Wrapper Type drop-down list. There are several details that you will need to enter in order to create the wrapper. Select the Site for the advertisement from the drop-down list of sites and enter a name for the advertisement in the Description field. Select a Background Colour and / or a Background Image for your advertisement and a Width and Height based on the dimensions of your screen. Press the Save button to save the details of the wrapper and return to the Online Advertising Editor.
Your wrapper should now be selected in the Online Advertising Editor. Now we need to create the message that will appear in the animation. Click the Edit button to open the Animation Builder. This screen has a set of General settings for your animation followed by the details of the first line of text which defaults to "Your message here". The General settings for your animation allow you to change the Name, Background Colour, Text Colour and Font Size of the advertisement. Edit the text on the first line of your message. The Effects section allows you to add / edit / delete special effects to the line of text and you can insert a new line of text after the last line by pressing the Add new line link. At any time you can remove a line of text (unless it is the only line) by clicking the Delete line link. Note: For details on how to edit an advertisement that uses an Image Wrapper or HTML Wrapper, please see the tutorial on the HTML Editor.
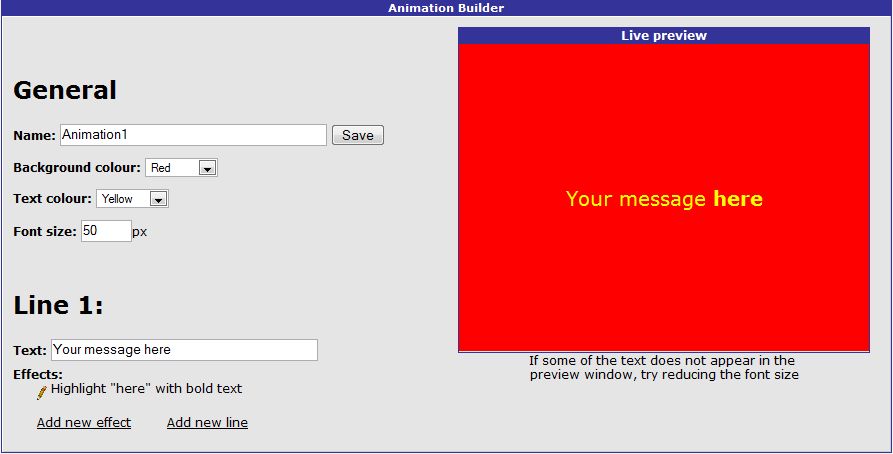
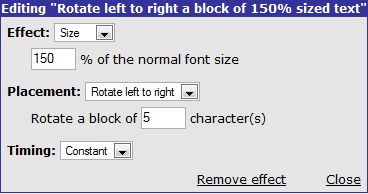
Click on the  icon to edit the current effect in the first
line of text. The effects that you can have include text formatting (bold
or italic) or changing the font size or text colour for a block of text.
In combination with the Placement
field you can create some very interesting effects. For example, to have
a "rolling magnifying glass" where the text size is increased
as you go from left to right, set the Effect
to Size and enter 150 in the
% of the normal font size field,
set the Placement field as Rotate left to right, set the block
to 5 characters and the Timing
as Constant. Feel free to experiment
with the special effects until you come up with a combination that works
for your advertisement. Click the Save
button to save the changes you have made and return to the Online
Advertising Editor.
icon to edit the current effect in the first
line of text. The effects that you can have include text formatting (bold
or italic) or changing the font size or text colour for a block of text.
In combination with the Placement
field you can create some very interesting effects. For example, to have
a "rolling magnifying glass" where the text size is increased
as you go from left to right, set the Effect
to Size and enter 150 in the
% of the normal font size field,
set the Placement field as Rotate left to right, set the block
to 5 characters and the Timing
as Constant. Feel free to experiment
with the special effects until you come up with a combination that works
for your advertisement. Click the Save
button to save the changes you have made and return to the Online
Advertising Editor.
At this stage of the tutorial you have managed to create and save your first animation advertisement. The next step is to enable the advertisement in the Portal by informing the Portal that it is ready for publication. We do this by pressing the Update button. Pressing this button uploads all current advertisements, so it is a necessary step when you add, edit or delete any of your advertisements.
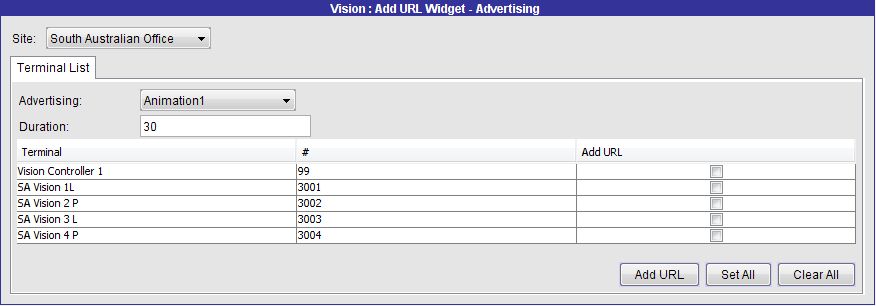
The final step is to display the advertisement on one or more of your Vision terminals. This can be done by pressing the Add URL button which opens a screen that lists each of your Vision terminals in the site. Set the Duration and then add the advertisement to each terminal by checking the box in the Add URL column as needed. You can use the Set All button to add the advertisement to every terminal. Press the Add URL button to commit the change to the Portal. In the Vision URLs tutorial we will discuss how to set the display order of your advertisements in your Vision terminals.
In this tutorial we have discovered how easy it is to create promotional messages for your Vision terminals. These advertisements help to keep your customers informed of what is happening at your venues and can help to increase excitement and patronage of your Sites. Later in this series of tutorials we will discuss how to create menu boards to use in conjunction with your advertisements.