|
|
Tutorial: Uploading Images |
|
|
Tutorial: Uploading Images |
Images are used to make advertisements and menu boards more attractive to your customers. This tutorial describes the simple processes of how to upload images to the Vision Portal and how to report on the available images.
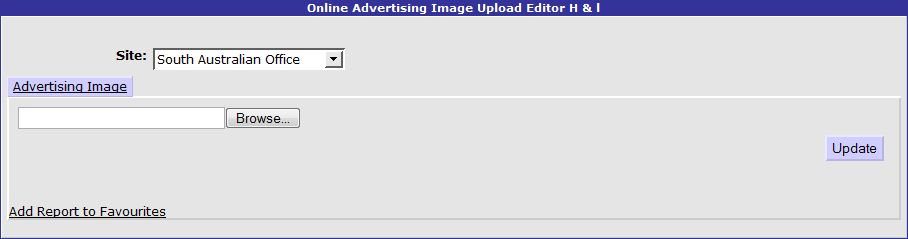
If the Portal's Navigation Menu is not already in the Vision Menu, start by navigating to the Vision menu by clicking the Menus link followed by Vision. Open Vision Maintenance by clicking on the link and a drop-down list of menu items will be displayed. A link is provided to allow you to open the Company Options for the Vision system. Click on Image Upload to open the Online Advertising Image Upload Editor for your company. We will discuss the Image Report link later which will take you to the reports screen which details the images in the Vision Portal.

Images can either be uploaded by site or for all sites at once. If uploaded for a single site, the image will only be available for advertisements and menu boards in that site. Either enter the full file path for an image (if known) or press the Browse button and find the image to upload. Press the Update button to upload the image to the Vision Portal. The Image Upload screen can also be used to upload other files such as Flash SWF files for advertisements.
The Image Report screen lists each of the uploaded files, their size (in KB) and a thumbnail preview of each image. The report can be site-specific or encompass all sites. Like all reports it is possible to print a hard copy by pressing the Print link at the top of the screen.

In this tutorial we have discussed how to upload images for use in your Vision Advertisements and Menu Boards. We have also looked at how to report on the uploaded images in the Portal. Later in this series of tutorials we will use some of the uploaded images to create dynamic advertisements and menu boards, the two key features of Zen Vision.