|
|
Tutorial: Requisitions |
|
|
Tutorial: Requisitions |
Requisitions in the Portal allow stock ordering procedures to be controlled by the Head Office of the Company. A requisition is raised by the Venue and sent to Head Office, which is then approved or denied as necessary. After a requisition is approved, a Purchase Order is automatically generated to be sent to the supplier. In this tutorial we will discuss the process of creating a requisition in the Portal.
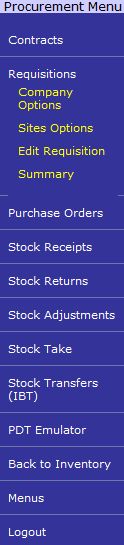
To create a requisition, open the Edit Requisitions screen from the Requisitions section of the Procurement Menu. The Procurement Menu can be opened by selecting Menus, Inventory and Procurement from the Navigation Menu.
The Requisition drop-down list allows you to select a non-finalised requisition to edit or select "New Requisition" to create a new requisition. Select the Site from the provided drop-down list. The Date of the requisition is automatically displayed in the provided field but can be overwritten if desired. Likewise, the Due date is also automatically calculated and can be overwritten if necessary. Special delivery Instructions can be entered in the provided field. The Item Code field is used to enter items for the requisition. Use the Find button to search for items and use the Add button to add it to the order. As items are added they are displayed in the grid with some details such as the cost of the item. Enter the number requested for each ordered item; the line total is automatically recalculated. Press the Update button to update the changes to the items ordered in the requisition. If you make a mistake, select the wrong item in the grid and press the Delete button. The Print button is used to print the requisition.
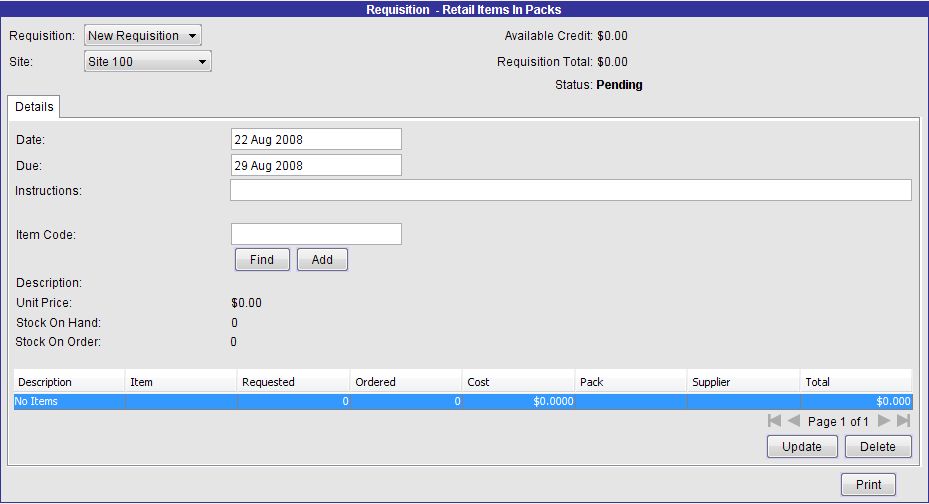
After you enter at least one item, two more buttons are added to the screen. Delete Order removes the entire order from the Portal. Email HQ sends an email of the requisition to the Head Office. The email is sent to the Event Email address set in the Company Details Contact screen.
Press the Email HQ button to send the request to Head Office. The Head Office will receive an email containing a PDF attachment of the requisition and links to either view the requisition in the Portal, accept the requisition or deny it. If the Requisition is viewed in the Portal, the Finalise button accepts the request. If the requisition is accepted a Purchase Order is generated; if it is denied a reason must be entered and the Site has the opportunity to edit the Requisition and resubmit it.
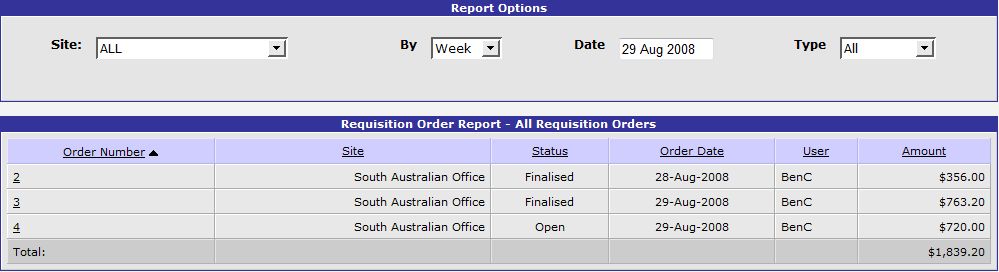
The Portal provides a report to view the status of Requisitions. This report can be accessed by selecting Summary from the Requisition section of the Procurement Menu. Displayed in this report is each Requisition's Order Number, the submitting Site, the Status of the Requisition, the date the order was submitted, the User that submitted the Requisition and the total amount that the Requisition is for. Select the Site to view and whether to view the Requisitions for the day, week or month of the entered date. The Type drop-down allows you to select to view Requisitions that are Pending, Finalised, Submitted, Deleted or All Requisitions in the report. Click on an Order Number to open the Edit Requisition screen to edit the selected order or resubmit it to Head Office.
In this tutorial we have looked at how you can use Requisitions to control stock ordering from Head Office. We have described the process of submitting a Requisition to Head Office and approving or denying that request. The Portal's reporting feature allows us to view the status of Requisition Orders and provides access to resubmit an order.